
Setting up your turntable correctly is fundamental if you want to achieve the best possible sound from your vinyl records. Accuracy is key, and it’s easy to understand why when you consider the task at hand. The average LP has about 1,500 feet of groove on each side, and the groove in question is less than a hairline thick. The more precisely your stylus can track said groove, the better your records will sound, and the longer they will last. All of this starts with correct turntable setup.

How much detail you will need to follow depends greatly on what kind of turntable you own. Many new entry-level turntables are fairly plug-and-play, with just a few things to adjust. As you move into higher-end turntables, there is often a little more assembly required. But whatever turntable you own, setting up invariably starts with the right surface top or support.
Find a Resonance Free Surface
The surface your turntable sits on can have a huge impact on the final performance and sound. The ideal surface should be perfectly level and free from resonance. If your hi-fi is set up in your living room, finding the ideal surface is often challenging, but try if you can to avoid excessive resonance, as any vibrations can result in degraded sound.
The sound from your speakers is an obvious common problem, as are footfall vibrations from suspended wooden floors. It pays to minimize your surface contact with the floor as much as possible. Some audiophiles will go as far as mounting a dedicated wall shelf. If this is not desirable or possible, then a sturdy hi-fi rack with isolation feet will do the trick. If you opt for standard furniture, then feet-mounted units are best as they will minimize contact with the floor surface. For example, I own a vintage 1960s unit with hairpin legs that work well. You can also further improve isolation by mounting the turntable on top of an isolation platform, or by upgrading your deck’s feet.
Always Level Up
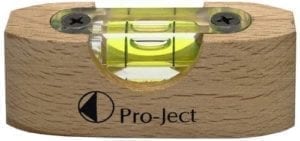
Once you’ve settled on the ideal surface, it’s absolutely critical that your turntable is level. Use a small spirit level to measure this as it will help to ensure that your stylus can sit correctly in the record groove. Start by measuring the plinth, which is the main body of your turntable. If you need to make adjustments, most turntables enable you to tweak the feet until it sits just right. Check the turntable at multiple points using the spirit level to achieve an even surface across the desk.
Fitting the Cartridge
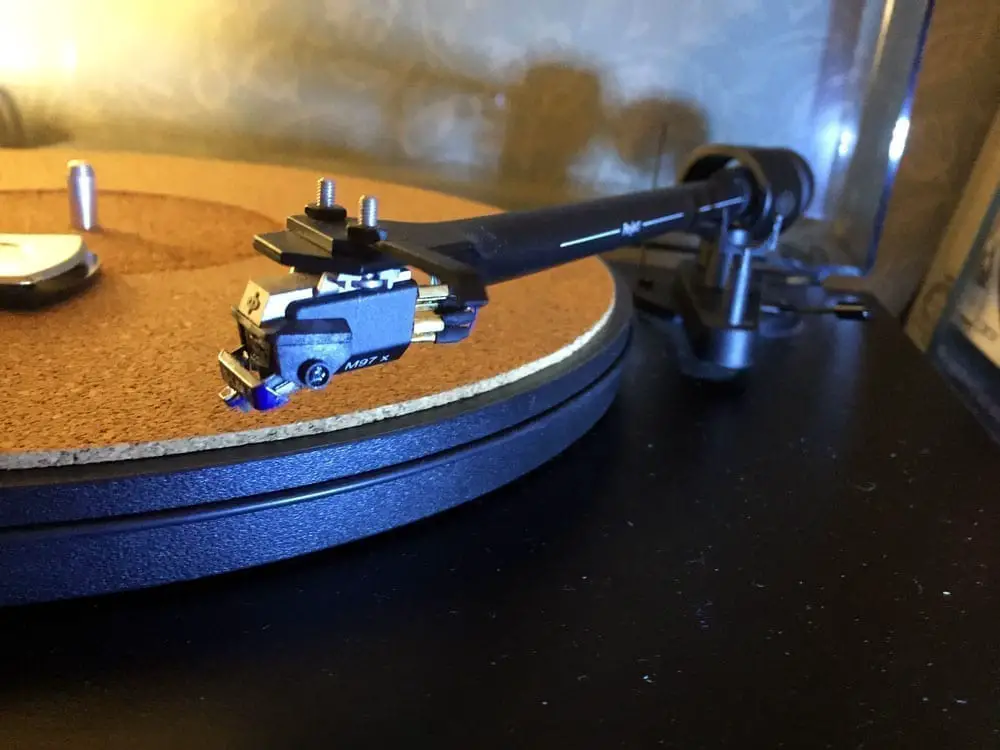
Most decks come pre-fitted with a tonearm unless you have purchased a more specialist desk. Many also come pre-fitted with the cartridge, however, higher-end models often don’t. Either way, you’ll need a cartridge fitted before you can set the tonearm ready for playback.
Fixing a cartridge to the headshell is fairly simple, but also fiddly. Most cartridges are held on with a pair of bolts. Once mounted, you’ll need a pair of long-nose pliers to attach the color-coded wires. Usually coded as follows:
- White Left channel positive (L+)
- Red Right channel positive (R+)
- Green Right channel return (R -)
- Blue Left channel return (L -)
These are often very delicate, so take extra care.
Set the Correct Tracking Force
The counterweight on the end of your tonearm is used to apply the correct amount of pressure in agreement with the manufacturer’s recommendations. Correct tracking force is important; set it too high and the sound will be dull, set it too low and cartridge won’t track properly.

Assuming your tonearm is pre-fitted with a cartridge, here’s how to balance a tonearm and set the tracking force.
1: Remove the stylus guard. This will add to the weight and we don’t want that!
2: Make sure that your turntable’s anti-skating dial or weight is set to zero (you don’t want any additional weight on the tonearm at this stage).
3: Use the weight on the back of the arm to balance the tonearm until it floats on its own.

4: Turn the number dial (which turns independently from the weight itself) until it reads zero. The tonearm should still be floating freely, and you’re ready to apply the weight specified in your cartridge manual.
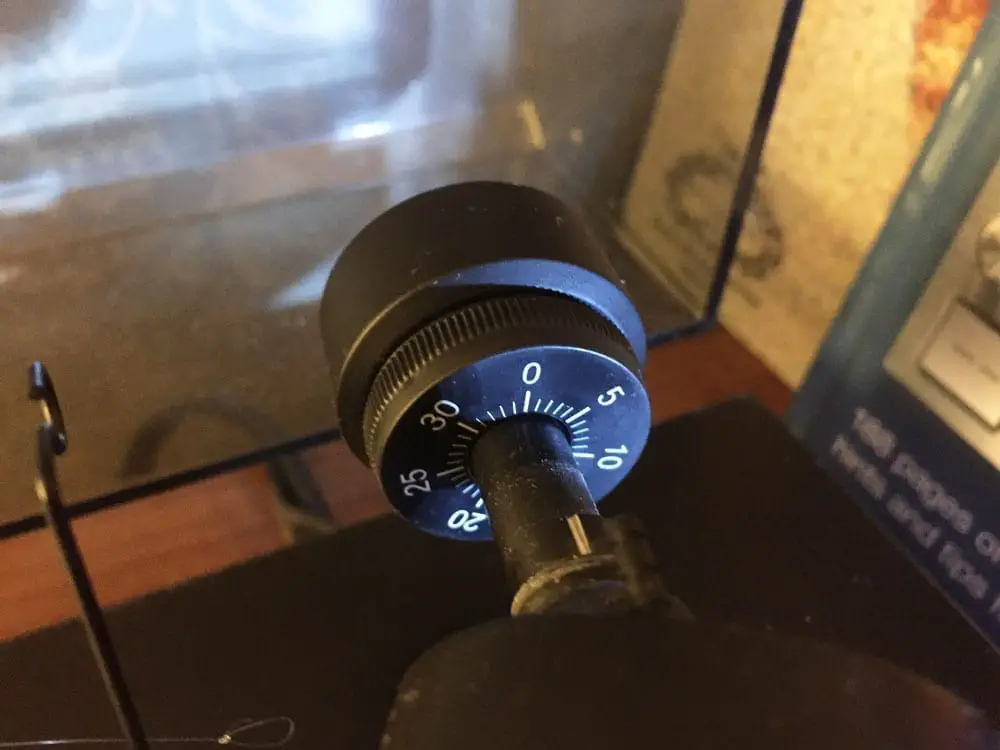
5: Turn your counter-weight until the dial reads the correct number. Once set, your cartridge will track at approximately the right pressure.
(Refer to your turntable manual for details on how your counterweight scale represents downforce. In my case, one mark on the scale represents 1 mN (0.1g). To apply the 1.75g required for my cartridge, I simply set the counterweight to 17.5 mN.)
6: To ensure a more accurate weight, adjust using a stylus tracking force gauge.
Cartridge Alignment
The cartridge is attached and the tonearm balanced; we must now set the alignment to ensure the stylus correctly tracks the record groove. If your cartridge is a factory-fit, this should already be correct, but in all honesty, it pays to check, just in case.
Record grooves are cut in a linear fashion. With a standard pivoted tonearm, the stylus traces across the record in an arc, meaning only an approximation of the cutting head’s tangential path is possible. Correct alignment will ensure that we minimize tracking errors across the record surface. For this application, I recommend using a cartridge alignment protractor. We use this to align the cartridge cantilever at two null points. These null points are the only spots across the record surface where the stylus can perfectly align with the record groove. By aligning to these two points, we achieve the best possible result from a pivoted tonearm.
Step 1: If your headshell allows for overhang adjustment (that’s the distance between your center spindle and the stylus tip) make sure you adjust the length in agreement with your turntable manual.
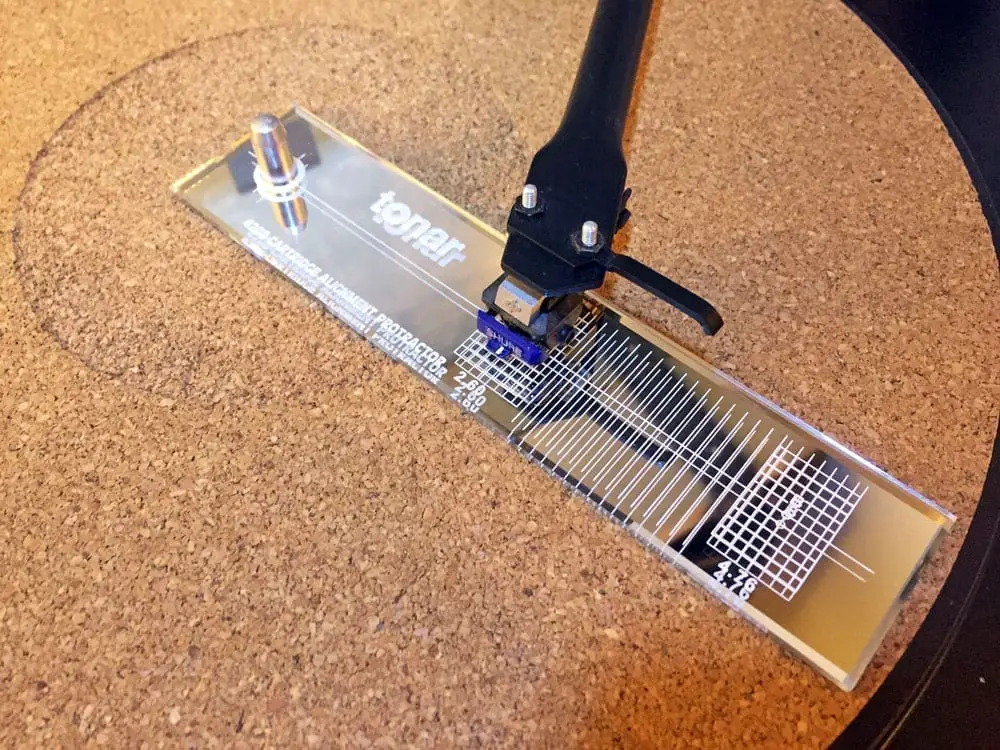
Step 2: Place your cartridge alignment protractor on the platter, and carefully drop the stylus tip onto the first alignment null point. The metal cantilever holding the stylus tip should be parallel with the guidelines on your protractor – if it isn’t, carefully adjust the headshell screws and adjust until everything lines up. (The alignment tool I’ve linked is a mirror protractor, which helps you achieve accurate results).
You can also use the front and side of the cartridge body to help you achieve perfect alignment with the horizontal and vertical lines on your protractor, but it is the cantilever alignment that matters most. After all, each cartridge is assembled by hand and the cantilever may not 100% line up with the cartridge body. If this is the case, lining up with the cartridge body may actually mean that your cantilever (the important bit holding the stylus!) is still actually unaligned.
Step 3: Use the second null point to check your results. If all is well, the cartridge should align correctly at both points. Chances are that it won’t be and you’ll need to make further adjustments.
Step 4: Check your tracking force, to make sure it’s still correct now everything is in place.
Step 5: Check that your overhang (as mentioned in step one) does, in fact, meets the tonearm specifications. If your alignment is successful, it should meet the specified distance. (My manual specifies 18.5 mm, for example).
Setting the Anti-skate
The purpose of anti-skate is to counteract the force naturally pulling your stylus toward the record spinal. This force encourages the stylus to ride the inner edge of record grooves and prevents it from sitting centrally. The result is decreased sound quality and increased record wear. When the correct anti-skate is applied, your stylus will sit centrally in the groove without riding either side.
A good method for approximating anti-skate is to use a single-sided piece of vinyl. Alternatively, you can buy a blank record without any grooves for this very purpose.
Simply set the anti-skate to zero. Now spin the blank record and gently place your stylus on the record surface. (Notice how the tonearm starts moving towards the center spindle).
Next, slowly apply the anti-skate. If your turntable has a dial, you can slowly increase the amount until the stylus will stay still when placed on the record surface.
If you set the dial too high, the opposite problem will occur and your tonearm will move towards the record edge.

Many turntables feature a suspended weight on a wire resembling fishing line to act as anti-skate. If your turntable has one of these, then you’ll notice different notches that hold the wire in place. You can adjust the amount of anti-skate using these notches.
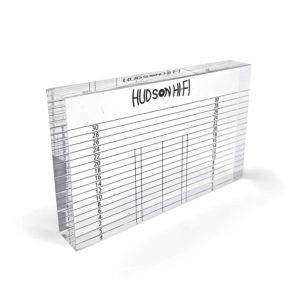
For a more accurate adjustment, consider buying a test record, such as this one from Hi-Fi News. Using the anti-skating mechanism, adjust the amount of anti-skate until the Bias Setting tracks on the test record
Still with me? Thinking of going back to digital yet?…
No? Good!
If your turntable is an affordable model (like many ProJect or Rega models for example), then you’re basically set and ready to play records. More advanced decks will allow – and may require – further adjustment. Here’s what you need to know:
Azimuth
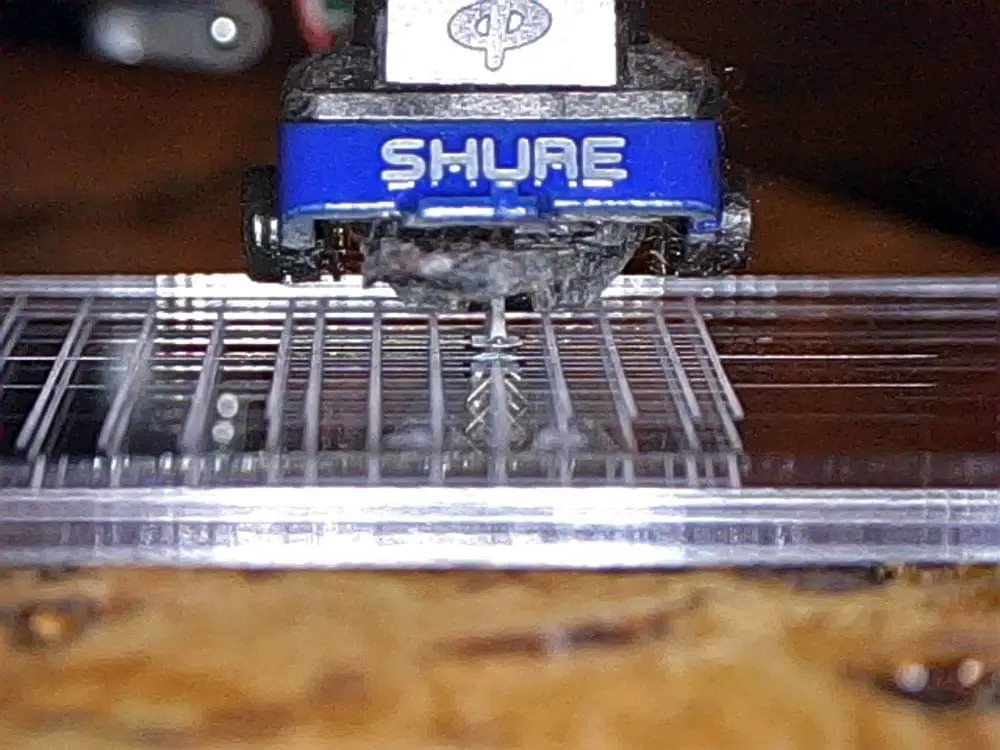
This setting refers to how the cartridge is aligned from a horizontal perspective. This, in turn, affects the angle at which the stylus sits in the record groove. In theory, when the cartridge is perfectly parallel with the record surface, the stylus will sit correctly inside the record grooves. When azimuth is set incorrectly, the stylus can sit tilted inside the groove, which can result in left and right channels leaking into one another. This leaking between channels is known as “crosstalk”.
A good starting point is to make sure the headshell is parrellel with the record surface. For this, you can use an acrylic block designed for measuring Azimuth and VTA to measure against the vertical lines. This will give you an approximate setting, but it is impossible to set this perfectly by eye. You can get a more accurate result using software that manages cross-talk, but for many listeners, this is cost prohibitive. The acrylic block method will get close enough for most.
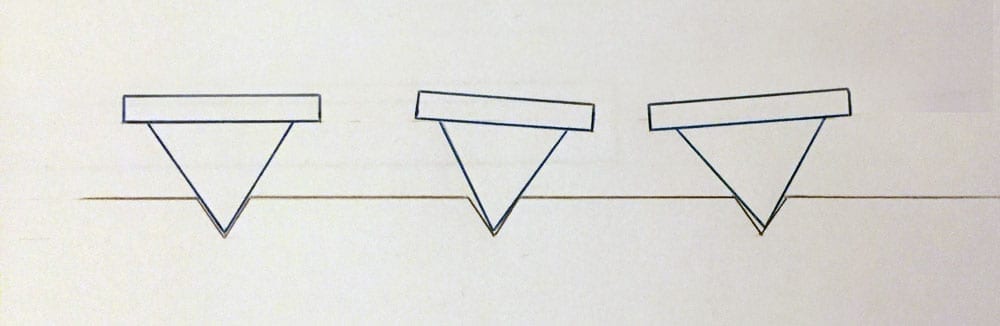
Vertical Tracking Alignment (VTA)
This is a topic that divides opinion. Here’s my understanding and attempt to cut through some of the tech to a simple answer. VTA refers to the angle of the tonearm when viewed from the side. This setting then determines the stylus raking angle (SRA). It is the stylus raking angle that matters, and in theory, this should be set to the angle at which the record grooves are cut (in most cases 92 Degrees although this does vary) as this will yield the lowest possible intermodulation distortion.
A good rule of thumb for setting SRA is to set the VTA perfectly horizontal across the record surface, and then gently raise the back of the tonearm to around a 15-degree angle and listen to how it sounds. Ultimately, it is virtually impossible to get this setting perfect and unless you have software to monitor the intermodulation distortion, your SRA will be an approximation at best. It is possible to use a USB microscope that will enlarge the stylus on your computer screen to aid in achieving the near-perfect SRA, but even then, different record thicknesses will change the VTA, resulting in an SRA change. I’ve even heard of some folks using different thicknesses of slip mat in an attempt to counteract this problem. In the end, how far you want to go is up to you, but starting with a parallel VTA and then slowly adjusting from this point is the best place to start. You can use clear acrylic tools, such as this one to help you adjust the VTA.
Optimization
After you’ve dialed in each the settings above, it would be easy to kick back and start enjoying some records. For the best results, though, it pays to revisit each one and check that nothing has changed, or suffered a knock-on impact from the previous adjustment. By this point, unless you can afford expensive measurement software (I know I can’t), it’s all about using your ears and honing in on each setting until you achieve the result that sounds best to you. A test record, such as the Hi-Fi News Test LP can help make this task easier. For example, this test LP features an azimuth test track that consists of a mono signal with the left and right channels out of phase. This makes setting azimuth easier if you have a preamplifier with a mono blend switch. Once in mono, azimuth is optimized when you hear minimal output through the loudspeakers.
Continue to make minor adjustments to your setup until you’re happy with the results, but don’t get too obsessive. Life is too short, and there’s far too much great music to enjoy. I recommend spending some time getting this right, as the results are rewarding and your records will last longer, but there has to come a point where you leave well enough alone. A perfectly optimized turntable is damn near impossible and somewhat subjective. Much of this is a balance with compromise. How far you’re willing to compromise and how scientific you want your setup practice to be will depend very much on your tolerance, patience, and ultimately, free time. It’s not a simple task, but few things worth having in this life are easy.
[…] For a detailed step-by-step guide on how to set up your turntable, consider reading our complete guide. […]
This was really informative and simple to understand. As an audiophile who is still learning the deeper side of things, this was the right amount of technical and layman’s explanation. Thank you for sharing!
That’s great! I’m glad it helped. That’s exactly what I aim for here at Sound Matters – just enough tech to help folks get more from their vinyl, but not too much tech!
Great article Marc! I confess I had no clue that azimuth was even a factor in tracking. Thanks for this.
Cheers! and thanks for reading 🙂